
Google Sign-In is ubiquitous across the internet, allowing users only to securely authenticate themselves with thousands of apps and websites in two taps.
-
Sign in with Google
-
Select your account
This type of single sign-on (SSO) is incredibly convenient for users and developers and if you implement it correctly, you can remove almost all friction in your conversion workflows.
In this blog post, I’m going to discuss how you can request additional information about users who create an account in your app using Google’s SSO. I’ll outline how you can set up Google Sign-In using the google_sign_in package and Firebase Authentication, what information can be requested, and how to handle various permission responses.
Setup
Adding Google Sign-In to an app using Firebase Authentication is simple and the steps are outlined in the Federated Identity & Social section of the Firebase docs. I’ll summarize them here for convenience.
If you don’t have a Firebase project setup yet, you can follow the instructions outlined here. Once you have a project setup, you can resume this tutorial.
First, add the google_sign_in package to your pubspec.yaml file.
dependencies:
  google_sign_in: ^6.1.4
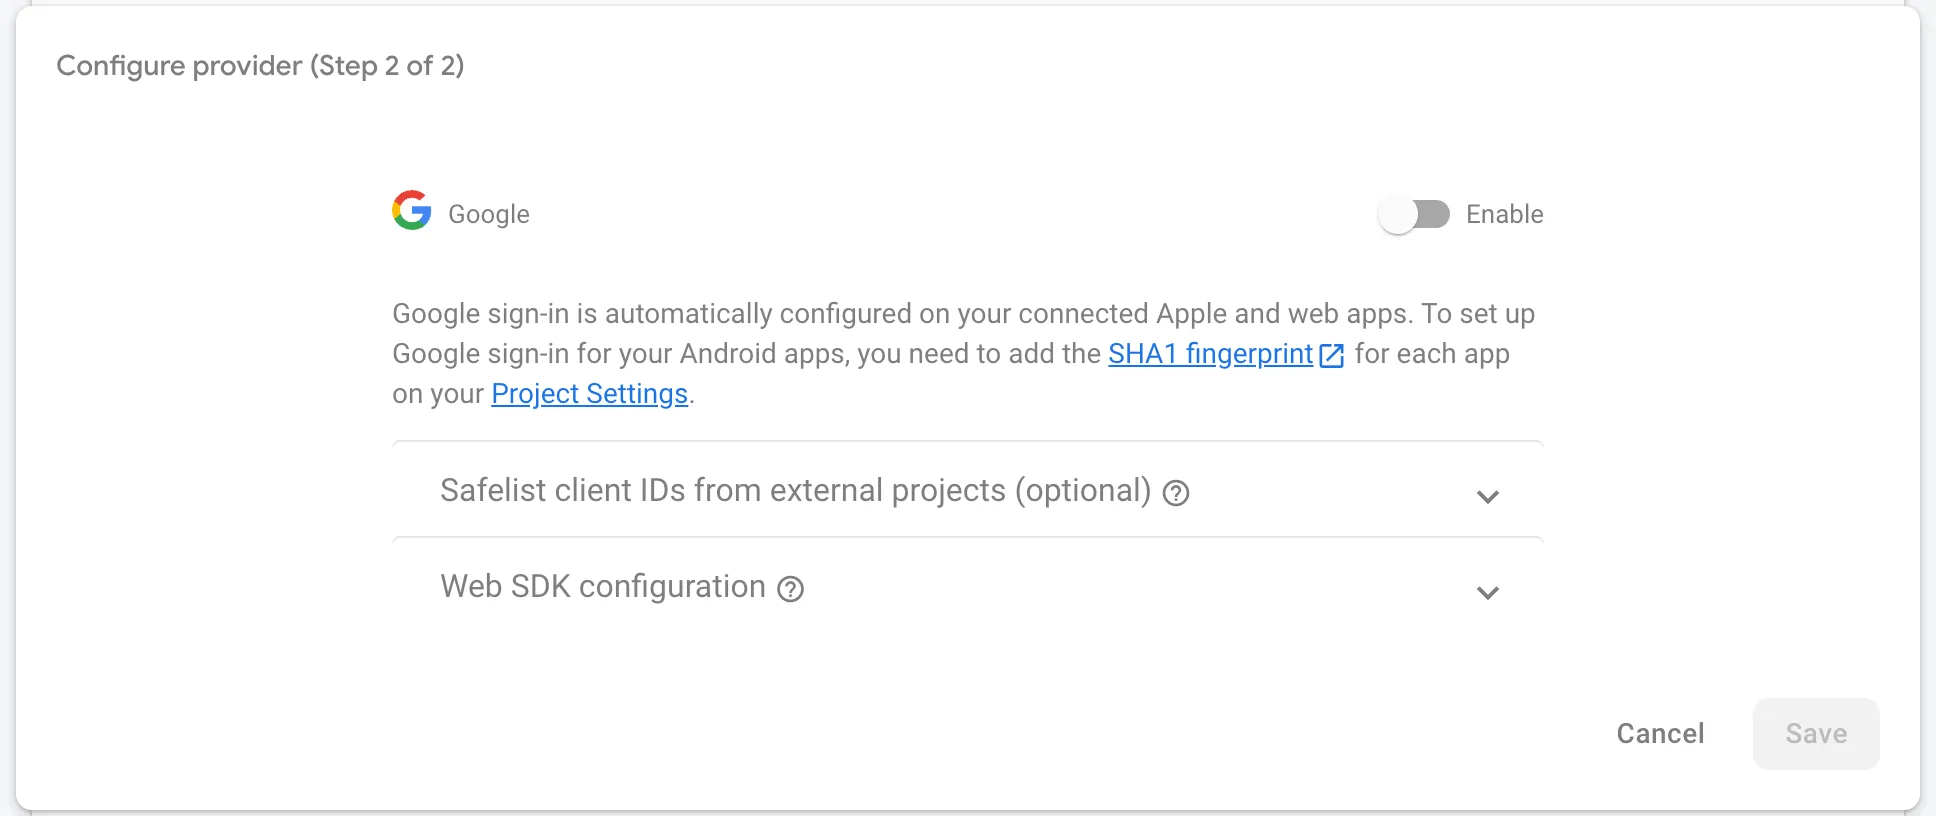
Second, verify that Google is enabled as a Sign-in provider in your Firebase Console. You can do this on the Authentication screen under the “Sign-in method” tab.
In order to request further information from users, you will also need to enable the People API for your Google project and create an API key.
Finally, configure the OAuth consent screen in GCP. This configuration screen lets you to edit the app name and logo that appears in the Google Sign-in page or popup. Note that adding a logo will require your app to go through the verification process.

Android
A SHA-1 fingerprint needs to be added to the Firebase console for Google Sign-in to work on Android. You can find that using the following commands (source).
Mac
keytool -list -v -keystore ~/.android/debug.keystore -alias androiddebugkey -storepass android -keypass android
Windows
keytool -list -v -keystore "\.android\debug.keystore" -alias androiddebugkey -storepass android -keypass android
Linux
keytool -list -v -keystore ~/.android/debug.keystore -alias androiddebugkey -storepass android -keypass android
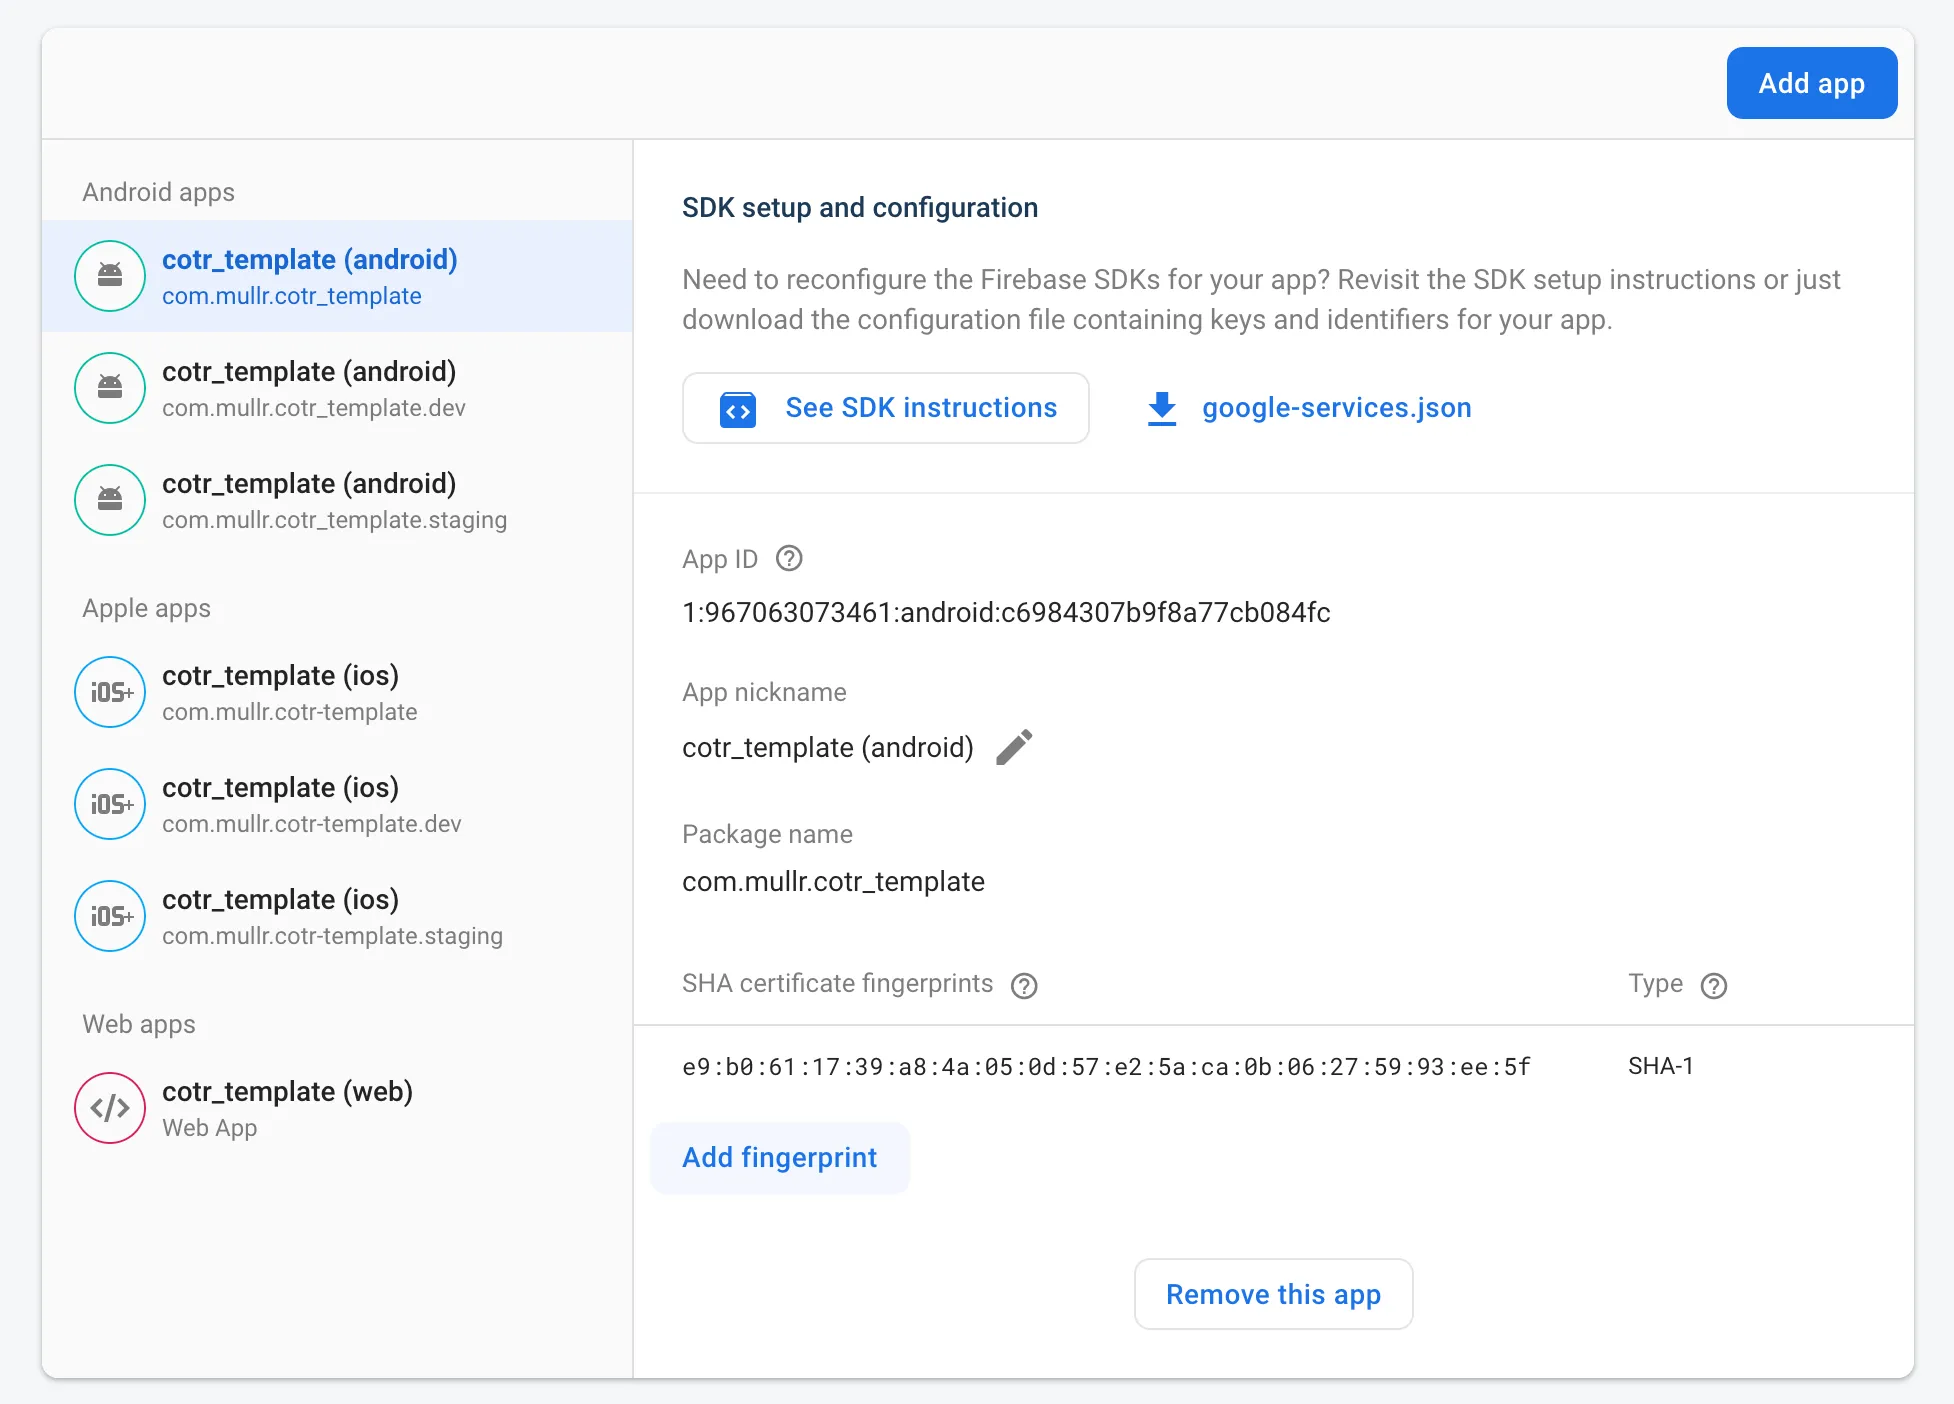
Once you have the SHA-1 fingerprint, navigate to the Project Settings screen in the Firebase console and scroll down to the bottom. Select the Android app you are developing and click “Add fingerprint”. Paste the key into the console (the SHA-1 tag will auto-highlight).
Sign Users In
With all of the groundwork laid, you can start having users sign in with Google. The process varies slightly on web and on iOS/Android but not by much.
Web
GoogleAuthProvider googleProvider = GoogleAuthProvider();

for (String scope in googleScopes) googleProvider.addScope(scope);

await FirebaseAuth.instance.signInWithPopup(googleProvider);
Mobile
GoogleSignIn _googleSignIn = GoogleSignIn(scopes: googleScopes);

GoogleSignInAccount? googleUser = await _googleSignIn.signIn();

// Obtain the auth details from the request
final GoogleSignInAuthentication? googleAuth = await googleUser?.authentication;

// Create a new credential
final credential = GoogleAuthProvider.credential(
  accessToken: googleAuth?.accessToken,
  idToken: googleAuth?.idToken,
);

await FirebaseAuth.instance.signInWithCredential(credential);
In both cases, the additional scopes you’d like to request must be specified when the user logs in. The scopes you request will determine how the Google permission popup appears.
Requesting Information
After the user is authenticated and has granted your application access to the specified scopes, you can use the Google API to get all or part of the information you need. Here is a function that fetches a list of person fields:
Future<GooglePerson?> requestData(List<GooglePersonField> keys) async {
    GoogleSignIn googleSignIn = GoogleSignIn();

    await googleSignIn.signInSilently();

    final headers = await googleSignIn.currentUser?.authHeaders;

    String personFields = keys.map((e) => e.name).join(',');

    String apiKey = const String.fromEnvironment('GOOGLE_API_KEY');
    final http.Response response = await http.get(
      Uri.parse('https://people.googleapis.com/v1/people/me?personFields=$personFields&key=$apiKey'),
      headers: {
        HttpHeaders.authorizationHeader: headers?["Authorization"] ?? '',
      },
    );

    GooglePerson googlePerson = GooglePerson.fromJson(jsonDecode(response.body));

    return googlePerson;
  }
There are a few interesting things to point out in this function. First, to acquire the necessary authentication headers for your request, you need the user to be signed in according to the google_sign_in package. You can ensure this is the case using the signInSilently() method before making your request.
You also need to add the API key you generated in the “Setup” step as a query parameter. To avoid adding the key to the code directly, I included it in my JSON configuration file and can therefore read its value using the String.fromEnvironment constructor.
Multiple pieces of information can be requested at the same time by using a comma-separated list after the “personFields” parameter. The possible values come from this list. If the user hasn’t granted your application access to a required scope or does not have the requested information in their Google account, then the related fields will be omitted in the response.
Deserializing the Response
All of the information returned by Google is JSON. I created a few classes with the @JsonSerializable() annotation to make handling the response a bit easier.
import 'package:json_annotation/json_annotation.dart';

part 'google_information.g.dart';

@JsonSerializable(explicitToJson: true)
class GooglePerson extends GoogleInformation {
  final List<GoogleName>? names;

  final List<GoogleBirthday>? birthdays;

  final List<GoogleGender>? genders;

  final List<GoogleEmail>? emailAddresses;

  final String? phoneNumbers;

  GooglePerson({
    this.names,
    this.birthdays,
    this.genders,
    this.emailAddresses,
    this.phoneNumbers,
  }) : super(resourceName: '');

  factory GooglePerson.fromJson(Map<String, dynamic> json) => _$GooglePersonFromJson(json);

  Map<String, dynamic> toJson() => _$GooglePersonToJson(this);
}

@JsonSerializable(explicitToJson: true)
class GoogleInformation {
  final String resourceName;

  final String? etag;

  GoogleInformation({
    required this.resourceName,
    this.etag,
  });

  factory GoogleInformation.fromJson(Map<String, dynamic> json) => _$GoogleInformationFromJson(json);

  Map<String, dynamic> toJson() => _$GoogleInformationToJson(this);
}

@JsonSerializable(explicitToJson: true)
class GoogleBirthday {
  final GoogleMetadata metadata;

  final GoogleDate date;

  GoogleBirthday({
    required this.metadata,
    required this.date,
  });

  factory GoogleBirthday.fromJson(Map<String, dynamic> json) => _$GoogleBirthdayFromJson(json);

  Map<String, dynamic> toJson() => _$GoogleBirthdayToJson(this);
}

@JsonSerializable(explicitToJson: true)
class GoogleDate {
  final int year;

  final int month;

  final int day;

  DateTime get dateTime => DateTime(year, month, day);

  GoogleDate({
    required this.year,
    required this.month,
    required this.day,
  });

  factory GoogleDate.fromJson(Map<String, dynamic> json) => _$GoogleDateFromJson(json);

  Map<String, dynamic> toJson() => _$GoogleDateToJson(this);
}

@JsonSerializable(explicitToJson: true)
class GoogleMetadata {
  final bool primary;

  final GoogleSource source;

  final bool? sourcePrimary;

  GoogleMetadata({
    required this.primary,
    required this.source,
    this.sourcePrimary,
  });

  factory GoogleMetadata.fromJson(Map<String, dynamic> json) => _$GoogleMetadataFromJson(json);

  Map<String, dynamic> toJson() => _$GoogleMetadataToJson(this);
}

@JsonSerializable(explicitToJson: true)
class GoogleSource {
  final String type;

  final String id;

  GoogleSource({
    required this.type,
    required this.id,
  });

  factory GoogleSource.fromJson(Map<String, dynamic> json) => _$GoogleSourceFromJson(json);

  Map<String, dynamic> toJson() => _$GoogleSourceToJson(this);
}

@JsonSerializable(explicitToJson: true)
class GoogleName {
  final String displayName;

  final String? displayNameLastFirst;

  final String? familyName;

  final String? givenName;

  final String? unstructuredName;

  final GoogleMetadata metadata;

  GoogleName({
    required this.displayName,
    this.displayNameLastFirst,
    this.familyName,
    this.givenName,
    this.unstructuredName,
    required this.metadata,
  });

  factory GoogleName.fromJson(Map<String, dynamic> json) => _$GoogleNameFromJson(json);

  Map<String, dynamic> toJson() => _$GoogleNameToJson(this);
}

@JsonSerializable(explicitToJson: true)
class GoogleGender {
  final GoogleMetadata metadata;

  final String? value;

  final String? formattedValue;

  GoogleGender({
    required this.metadata,
    this.value,
    this.formattedValue,
  });

  factory GoogleGender.fromJson(Map<String, dynamic> json) => _$GoogleGenderFromJson(json);

  Map<String, dynamic> toJson() => _$GoogleGenderToJson(this);
}

@JsonSerializable(explicitToJson: true)
class GoogleEmail {
  final GoogleMetadata metadata;

  final String? value;

  factory GoogleEmail.fromJson(Map<String, dynamic> json) => _$GoogleEmailFromJson(json);

  GoogleEmail({
    required this.metadata,
    this.value,
  });

  Map<String, dynamic> toJson() => _$GoogleEmailToJson(this);
}
Run flutter pub run build_runner build --delete-conflicting-outputs to generate the necessary to and from JSON methods.
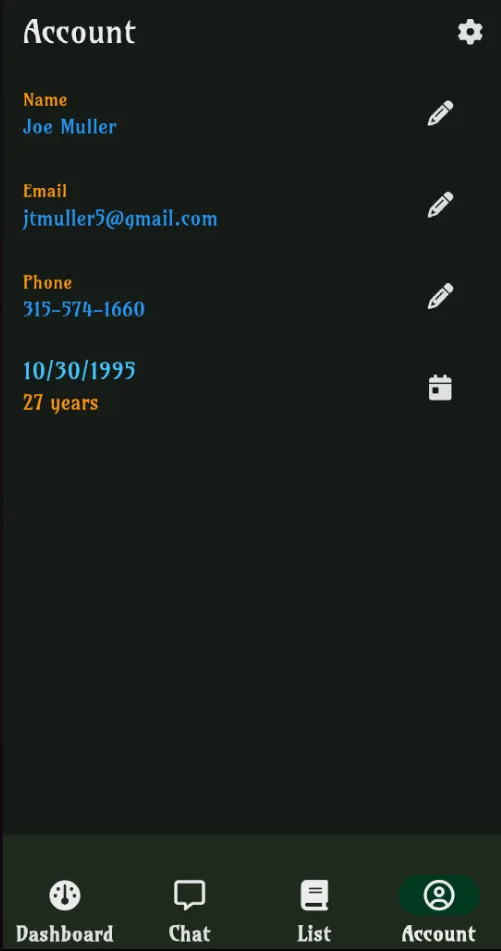
At this point, you can use the requested information to pre-populate forms and make the lives of your users a bit easier.
A similar setup can be implemented for other third party SSO providers, like Facebook and Apple. The available information varies depending on the provider you use but most of them provide access to the essential components (name, email, birthday, etc). In later blog posts I will explore those as well.
Troubleshooting
- Google will not return a user’s phone number if it is set up as their recovery number (source)